How to remove the background layer for a Procreate animation
- Evening Gallery

- Oct 2, 2021
- 2 min read
If you're new to using procreate sometimes the settings and menu's can be hard to find. In this post I'll teach you how to open the timeline, identify the menu's, and select the correct toggles in order to make a smooth procreate animation.
After purchasing the iPad Pro and the iPencil 2 I immediately purchased procreate. It feels like the ultimate all in one utility to make some pretty wild art. Procreate makes it easy to create perfect shapes, gradients, calligraphy, and the brushes available are ENDLESS! Procreate has allowed me to consolidate much of what I would normally do with Photoshop, After effects and Premiere pro into one easy to use program. While it doesn't do everything, it's definitely an essential tool in my kit.
One of my biggest pet peeves about much of these programs is there seems to be menu's... everywhere... and they all do different things without much instruction or information.
Assuming you already have your canvas set up, with the frames you want to work with...
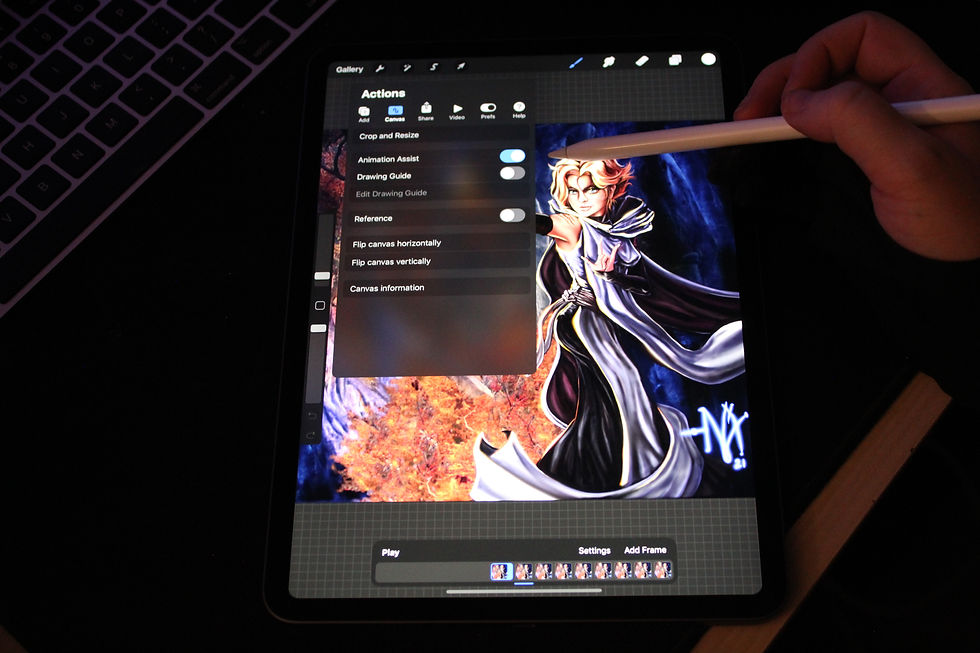
Step 1. You'll want to toggle on Animation assist, to find this you'll tap the "Wrench" icon beside "Gallery" at the top of your screen.
Step 2. Press "Canvas"
Step 3. Toggle Animation Assist on

With Animation assist toggled on, you'll notice the timeline will pop up at the bottom (or the side) of your screen.
Next, you'll probably want the first frame to be the background frame. Otherwise you'll get a big white flash in your animation.
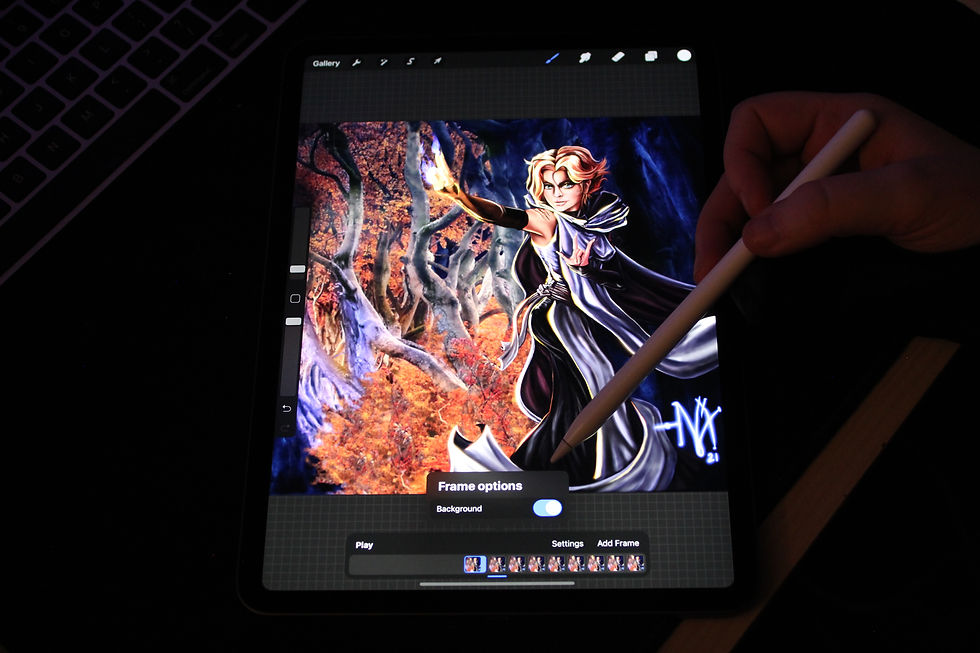
hold down the first frame aka Layer in the timeline
(or whatever frame you want to be the background)
A menu will open named "Frame Options".


To make the frame your background layer for your animation you'll need to toggle "Background" to on.

You'll now be able to animate your art, without having the big white flash when you loop.
If this post helped you solve this issue, please follow us and leave a message with the artwork this tutorial has helped you create.


Comments